Automate the process of issuing public key certificates from multiple sources, ensuring they are valid, up to date and renew before expiration.
cert-manager on a Kubernetes cluster.Prerequisites
Why do we need to worry about certificates? When declaring a domain name i.e my-website.domain.com and addressing it from either internal network and/or public internet, the devices used to perform the call (web browsers, internal services, containers etc..) would require to check its validity. In order to do that, the domain name should have a certificate that is issued and trusted to operate securely.
Why do we need a certificate manager? Certificate validity has its expiration date, which means certificates have to get renewed. It might be a cumbersome task when there are many certificates to handle. This is the reason cert-manager exists, to help with issuing certificates from a variety of sources, such as Let’s Encrypt, a simple signing key pair or self signed. It will ensure certificates are valid, up to date and attempt to renew certificates at a configured time before expiry.
MY_DOMAIN, please change accordingly. If you interested in a local-only work mode, you don’t have to pay for a new domain, just decide on a name and use it. For example, if your desired domain is homelab.com, replace MY_DOMAIN with homelab.K8s Controller
cert-manager is a Kubernetes controller that manage the certificate aspect of a cluster state. It looks after the state of certificates on a specific cluster and issue new ones or request to renew existing ones before expiration.
Prepare
cert-manager pod on a specific cluster node such as master for example, otherwise please continue to the next Install step.We want Kubernetes to create the cert-manager pod on the master node. In order to do that, we’ll have to label that node and use nodeSelector attribute when installing cert-manager Helm chart.
-
Get all nodes names and labels
1
kubectl get nodes --show-labels -
Label
kmasternode withnode-type=master1
kubectl label nodes kmaster node-type=masterNote: I’ll refer to the master node namedkmasteras specified in the RPi cluster installation post, replace the name with the one you have assigned to the master node on your Kubernetes cluster. -
Verify that label had been created successfully
1
kubectl get nodes --show-labels | grep node-type
Install
-
Create a
cert-managernamespace1
kubectl create namespace cert-manager
-
Disable resource validation on the
cert-managernamespace1
kubectl label namespace cert-manager certmanager.k8s.io/disable-validation=true
Note:cert-managerdeploys a webhook component to perform resource validations onIssuer,ClusterIssuerandCertificate. This webhook shouldn’t run on the same namespace thecert-manageris deployed on. -
Add the required Helm repository
1
helm repo add jetstack https://charts.jetstack.io
-
Update your local Helm chart repository cache
1
helm repo update
-
Search for latest
jetstack/cert-managerofficial Helm chart version1 2 3 4
helm search repo cert-manager # NAME CHART VERSION APP VERSION # jetstack/cert-manager v1.2.0 v1.2.0
-
Install the
cert-managerHelm chart using the version from previous stepWithout node affinity:
1
2
3
4
5
helm upgrade --install cert-manager \
    --namespace cert-manager \
    --version v1.2.0 \
    jetstack/cert-manager \
    --set installCRDs=true
With node affinity (if you have followed the
Preparestep):1 2 3 4 5 6 7 8
helm upgrade --install cert-manager \ --namespace cert-manager \ --version v1.2.0 \ --set nodeSelector.node-type=master \ --set webhook.nodeSelector.node-type=master \ --set cainjector.nodeSelector.node-type=master \ jetstack/cert-manager \ --set installCRDs=true
Note: Make sure you are running on Kubernetes >v1.19to have theinstallCRDsflag available. -
Verify installation
1
2
3
4
5
6
7
8
9
# Make sure all cert-manager deployed pods are running
kubectl get pods --namespace cert-manager

# Make sure custom resources *.cert-manager.io were created successfully
kubectl get crd | grep cert-manager

# Verify that ClusterIssuer is non-namespaced scoped ('false')
# so it can be used to issue Certificates across all namespaces
kubectl api-resources | grep clusterissuers
Uninstall
-
Remove
cert-managerfrom the cluster1
helm uninstall cert-manager --namespace cert-manager -
Clear the namespace
1
kubectl delete namespaces cert-manager
Self Signed
What? The self signed issuer does not represent a certificate authority as such, but instead denotes that certificates will be signed through “self signing” using a given private key.
Why? This means that the provided private key of the resulting certificate will be used to sign its own certificate.
When? This Issuer type is useful for bootstrapping the CA certificate key pair for some Private Key Infrastructure (PKI), or for otherwise creating simple certificates. Clients consuming these certificates have no way to trust this certificate since there is no CA signer apart from itself, and as such, would be forced to trust the certificate as is.
Who? Clients consuming these certificates could be services deployed to our local Kubernetes cluster that are exposed from outside the cluster such as Kubernetes dashboard, Jenkins UI, Private Docker Registry UI etc..
Issuer
-
Create a certificate
ClusterIssuer1 2 3 4 5 6 7 8
cat <<EOF | kubectl apply -f - apiVersion: cert-manager.io/v1alpha2 kind: ClusterIssuer metadata: name: MY_DOMAIN-ca-issuer spec: selfSigned: {} EOF
Important:cert-managerissues certificates through anIssuer. TheIssuercan issue certificates for the namespace it is created on, but aClusterIssuercan create certificates for any namespace. -
Wait for status to become
Ready1
kubectl get clusterissuers MY_DOMAIN-ca-issuer -o wide
Certificate
When creating a new certificate, make sure to create one on a named namespace. It’ll get verified by cert-manager even-though it exists on a different namespace since we are referencing a ClusterIssuer.
MY_NAMESPACE with the namespace of your choise.-
Create a namespaced
X.509certificate (check here for official schema)1 2 3 4 5 6 7 8 9 10 11 12 13 14 15 16 17 18 19 20 21
cat <<EOF | kubectl apply -f - apiVersion: cert-manager.io/v1alpha2 kind: Certificate metadata: name: MY_DOMAIN-com-cert namespace: MY_NAMESPACE spec: secretName: MY_DOMAIN-com-cert-secret isCA: true commonName: '*.MY_DOMAIN.com' organization: - MY_DOMAIN dnsNames: - MY_DOMAIN.com - '*.MY_DOMAIN.com' keySize: 2048 keyAlgorithm: rsa issuerRef: name: MY_DOMAIN-ca-issuer kind: ClusterIssuer EOF
-
Check certificate status is
Issued1
kubectl describe certificate MY_DOMAIN-com-cert --namespace MY_NAMESPACE -
Check that secret
MY_DOMAIN-com-cert-secretwas created successfully1 2
kubectl get secret --namespace MY_NAMESPACE kubectl get secret MY_DOMAIN-com-cert-secret -o yaml --namespace MY_NAMESPACE
-
(Optional): When in need to delete a certificate
1
2
3
4
5
# Delete certificate
kubectl delete certificate MY_DOMAIN-com-cert --namespace MY_NAMESPACE

# Delete the auto generated secret
kubectl delete secret MY_DOMAIN-com-cert-secret --namespace MY_NAMESPACE
Secrets
Follow these instructions to export the cert-manager generated certificate secrets as local files.
cert_file as a trusted certificate on a client machine (laptop / desktop), specially when using a self signed certificate.-
Create a local destination folder
1
2
3
mkdir -p $HOME/temp/MY_NAMESPACE/cert-secrets
export MY_DOMAIN=<insert-domain-name-here>
export MY_NAMESPACE=<insert-namespace-here>
-
Export the certificate secrets
cert_file - client certificate path used for authentication
1
2
3
4
kubectl get secret ${MY_DOMAIN}-com-cert-secret \
   --namespace ${MY_NAMESPACE} \
   -o jsonpath='{.data.tls\.crt}' | base64 -D \
   > $HOME/temp/${MY_NAMESPACE}/cert-secrets/cert_file.crt
key_file - client key path used for authentication
1
2
3
4
kubectl get secret ${MY_DOMAIN}-com-cert-secret \
   --namespace ${MY_NAMESPACE} \
   -o jsonpath='{.data.tls\.key}' | base64 -D \
   > $HOME/temp/${MY_NAMESPACE}/cert-secrets/key_file.key
ca_file - CA certificate path used to verify the remote server cert file
1
2
3
4
kubectl get secret ${MY_DOMAIN}-com-cert-secret \
   --namespace ${MY_NAMESPACE} \
   -o jsonpath='{.data.ca\.crt}' | base64 -D \
   > $HOME/temp/${MY_NAMESPACE}/cert-secrets/ca_file.crt
-
Check that x3 secrets exported successfully
1
ls -lah $HOME/temp/${MY_NAMESPACE}/cert-secrets
-
Clear exported variables
1
unset MY_DOMAIN MY_NAMESPACE
Trust
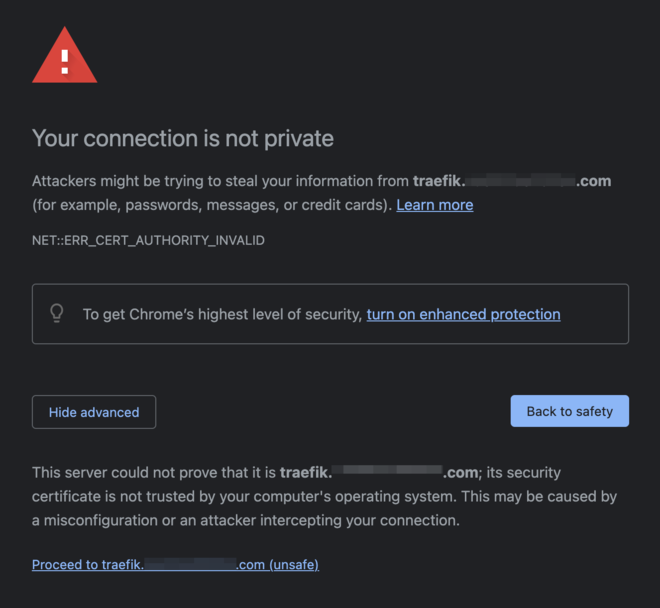
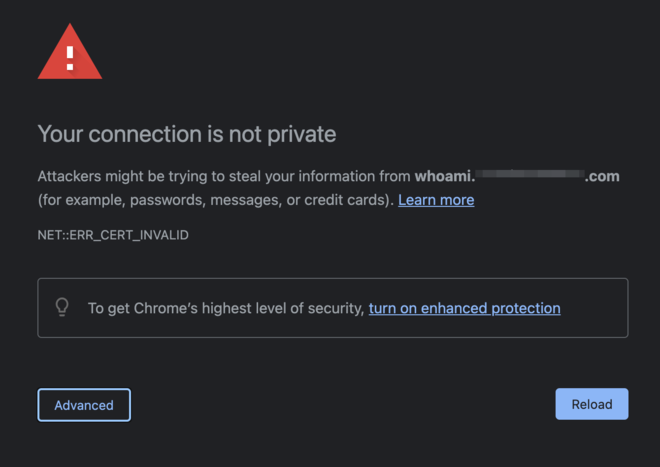
When addressing a Kubernetes ingress controller resource that had been signed with a self signed certificate secret, clients such as web-browsers would warn us of an invalid certificate authority or invalid certificate.
ERR_CERT_AUTHORITY_INVALID
ERR_CERT_INVALID
Since we are the ones that created the certificate we would like to tell our clients (laptop/desktop) to trust it. This is how you trust a certificate on macOS, for other operating systems please refer to official documentation.
-
Open the certificate file in macOS
Keychain Access- CLI:
open $HOME/temp/${MY_NAMESPACE}/cert-secrets/cert_file.crt - Other: double click on the
cert_file.crt
- CLI:
-
Double click on the
*.MY_DOMAIN.comcertificate and expand theTrustsection -
Within the
When using this certificateselectAlways Trust -
Open a web-browser and navigate to one of the domain names using the self signed certificate and verify that there are no errors
Advanced
This section contains non conventional tip & tricks, use it cautiously.
Share Secrets between Namespaces
When? Use when in need to copy a cert-manager generated certificate secret to a different namespace than the one it was created on.
Why? Useful when you need to reference the secret in some kind of ingress controller under its authentication spec which exists on a different namespace.
In order to solve this limitation we simple need to copy the secret to a different namespace as follows:
1
2
3
kubectl get secret MY_DOMAIN-com-cert-secret -n SOURCE_NAMESPACE -o yaml \
| sed s/"namespace: SOURCE_NAMESPACE"/"namespace: DESTINATION-NAMESPACE"/\
| kubectl apply -n DESTINATION-NAMESPACE -f -
cert-manager would lose track of the secret as it was copied manually and when the time to renew is due, the secret would become invalid.Summary
This post was a sneak peak on how to create certificates and manage their state using cert-manager Kubernetes controller.
What now? Now that you have a local self signed certificate, you can continue to create an ingress controller and expose internal web services within your home network such as Kubernetes dashboard, Jenkins UI, your web application UI with their own virtual hosted names i.e. kubernetes.MY_DOMAIN.com, jenkins.MY_DOMAIN.com, mydashboard.MY_DOMAIN.com etc..
Please leave your comment, suggestion or any other input you think is relevant to this post in the discussion below.
Thanks !
Credits: Logo by cert-manager.io

Discussion