Installing Kubernetes dashboard and enabling access via ingress controller with role-based access control (RBAC) authorization.
read-only mode with least privilege users permissions. Although the dashboard allows modification to the cluster resources state, it is better to do that using a managed CI/CD pipeline with revisions history to have the ability to compare or restore changes if required.Prerequisites
Dashboard
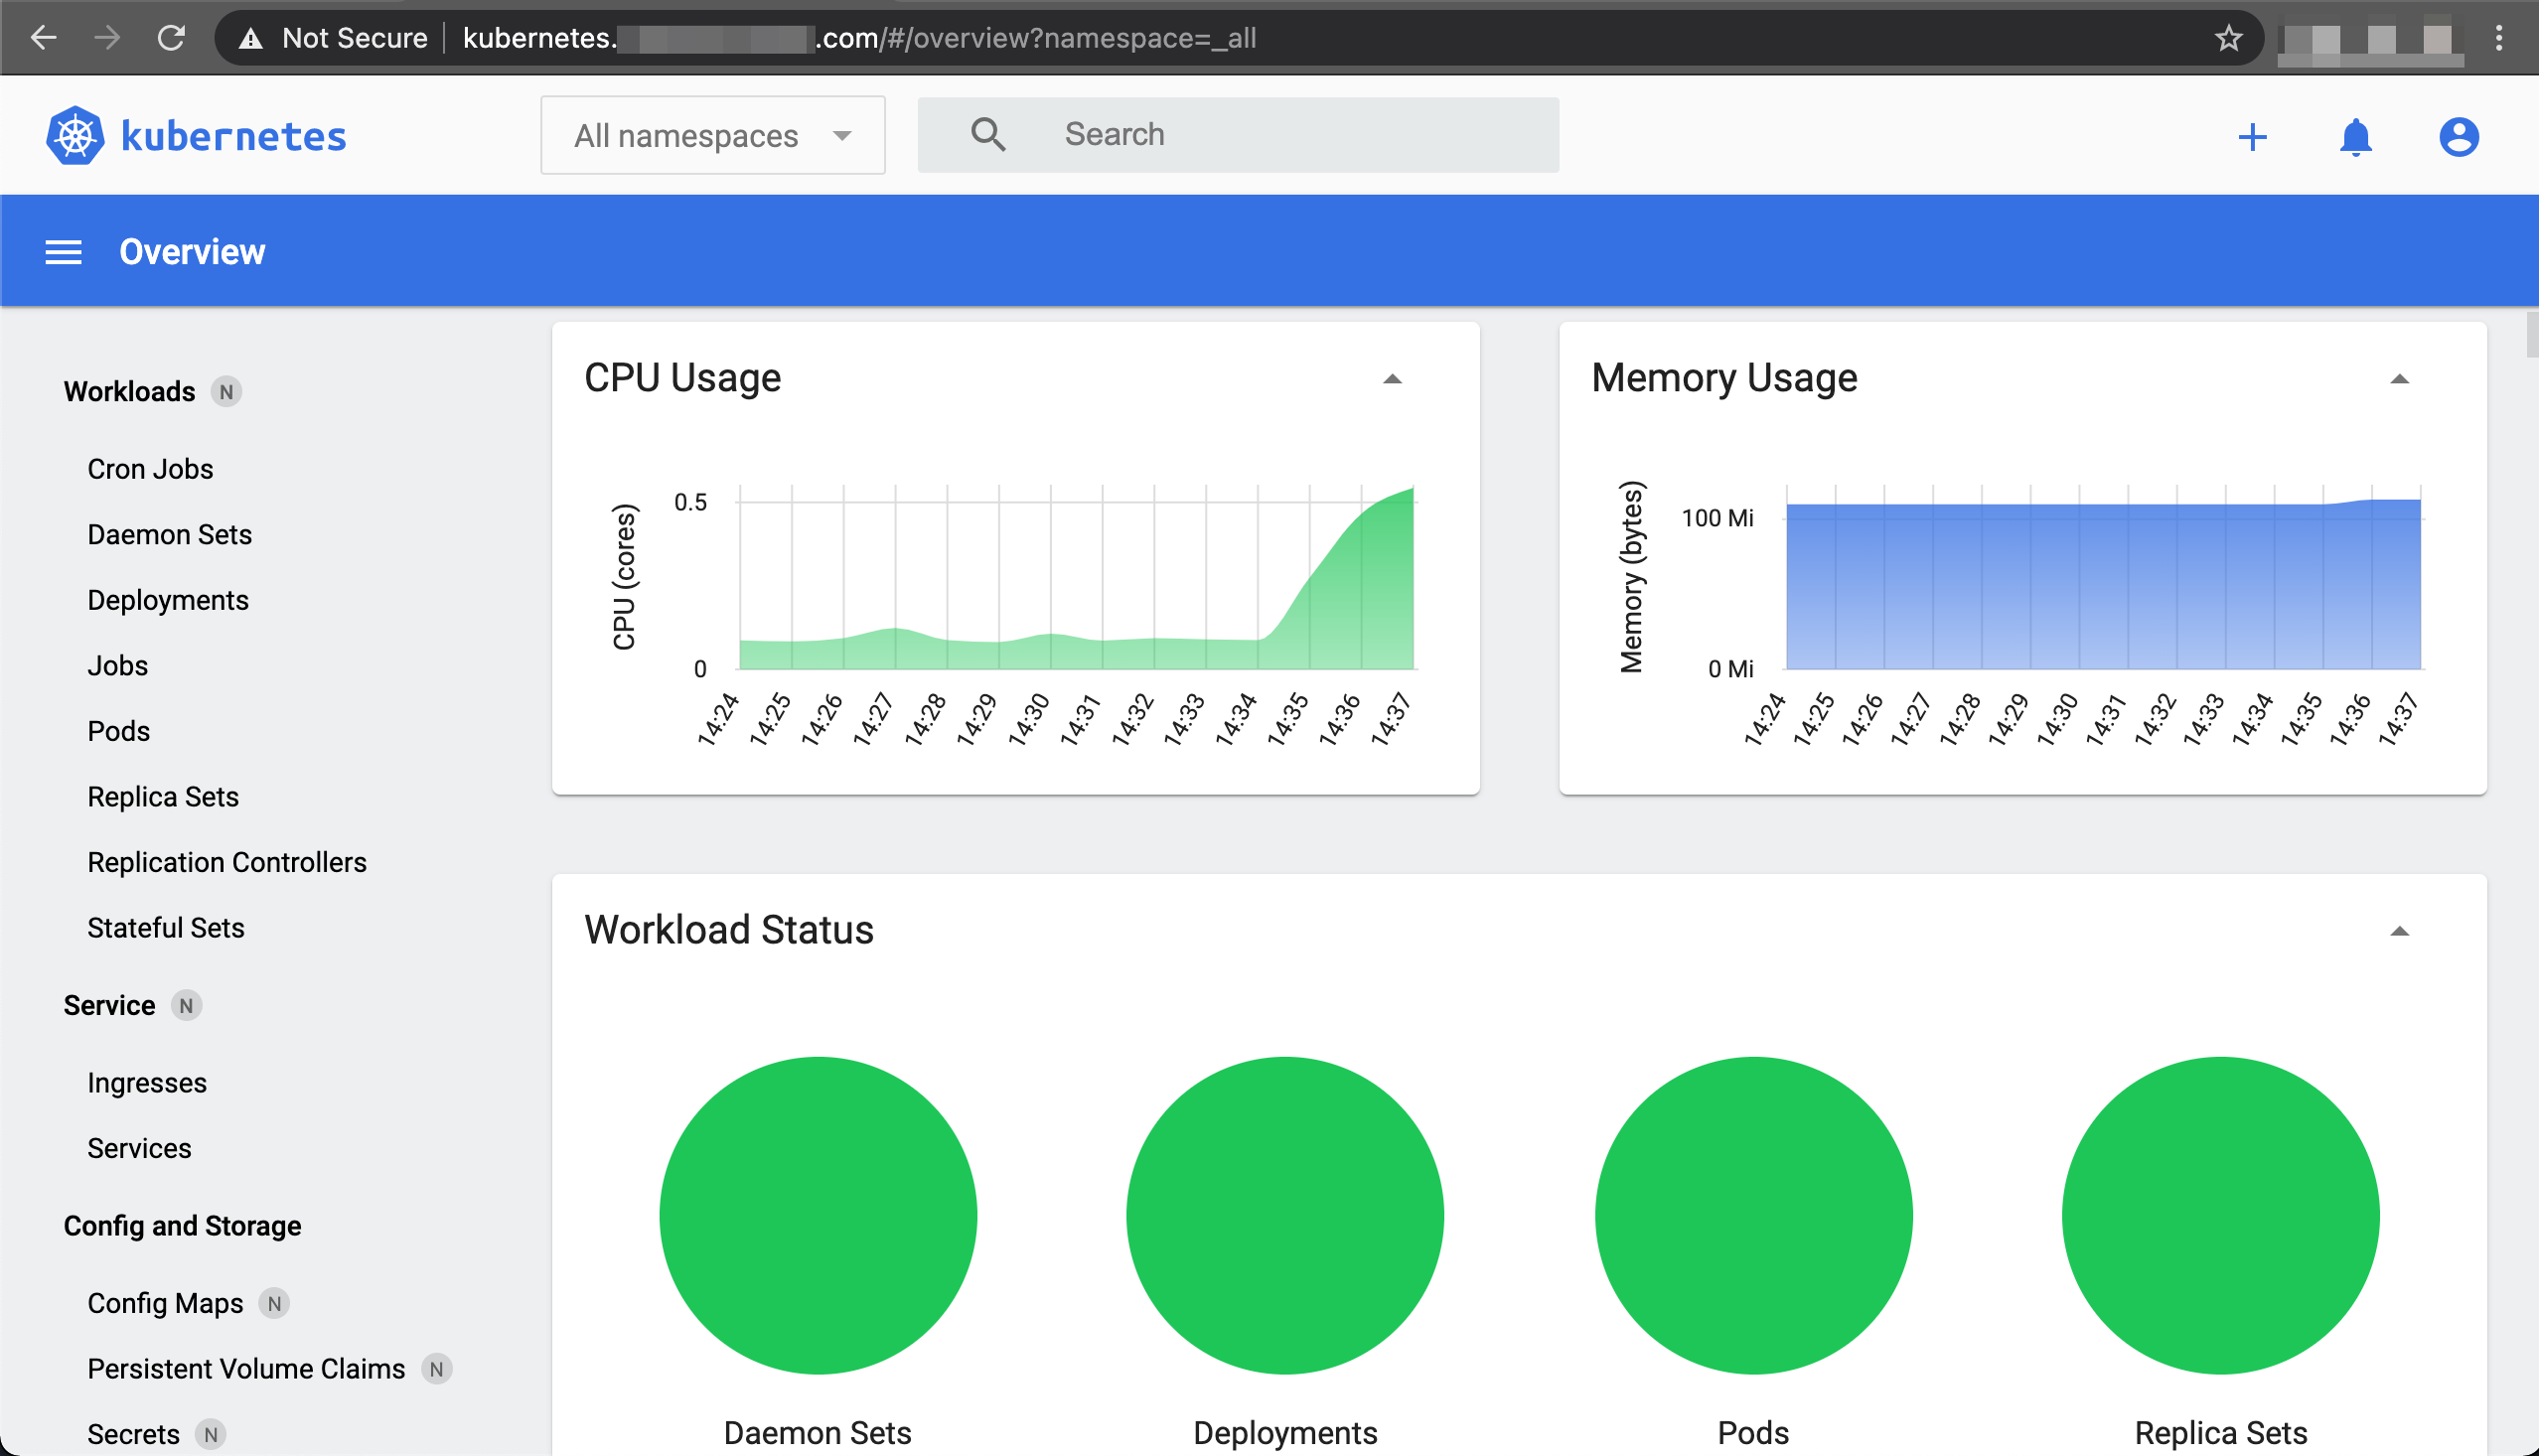
The dashboard is a web based user interface allowing us an overview of the cluster which consists of information about the state of Kubernetes resources and potential errors they might have for troubleshooting. We will install the Kubernetes dashboard using Helm chart.
Prepare
We want Kubernetes to create the dashboard pod on the master node. In order to do that, we’ll have to label that node and use nodeSelector attribute when installing kubernetes-dashboard Helm chart.
-
Get all nodes names and labels
1
kubectl get nodes --show-labels -
Label
kmasternode withnode-type=master1
kubectl label nodes kmaster node-type=masterNote: To remove a label, use the same command with dash after the label name e.g.kubectl label nodes kmaster node-type-. -
Verify that label had been created successfully
1
kubectl get nodes --show-labels | grep node-type
Install
-
Create a
kubernetes-dashboardnamespace1
kubectl create namespace kubernetes-dashboard
-
Add the
kubernetes-dashboardHelm repository1
helm repo add kubernetes-dashboard https://kubernetes.github.io/dashboard/
-
Update local Helm chart repository cache
1
helm repo update
-
Search for latest
kubernetes-dashboard/kubernetes-dashboardofficial Helm chart version1 2 3 4
helm search repo kubernetes-dashboard # NAME CHART VERSION APP VERSION # kubernetes-dashboard/kubernetes-dashboard 4.0.2 2.2.0
-
Install the
kubernetes-dashboardHelm chart using the version from previous step1 2 3 4 5 6
helm upgrade --install kubernetes-dashboard \ --set metricsScraper.enabled=true \ --set nodeSelector.node-type=master \ --namespace kubernetes-dashboard \ kubernetes-dashboard/kubernetes-dashboard \ --version 4.0.2
Uninstall
-
Remove
kubernetes-dashboardfrom the cluster1
helm uninstall kubernetes-dashboard --namespace kubernetes-dashboard -
Clear the
kubernetes-dashboardnamespace1
kubectl delete namespaces kubernetes-dashboard
Ingress
We will expose the Kubernetes dashboard using traefik ingress controller to avoid using the kubectl proxy option and allow access to the dashboard via HTTPS with proper TLS/Cert.
k3s and traefik, it is advised to disable SSL certificate verification between traefik and the backends using serversTransport.insecureSkipVerify=true flag as specified on the traefik installation post.Certificate
We will create a certificate using cert-manager to allow accessing the kubernetes dashboard using the hosted name kubernetes.MY_DOMAIN.com within our home network. Create a self signed certificate as described in here under kubernetes-dashboard namespace.
Verify that a TLS secret had been created for the certificate:
1
kubectl get secret MY_DOMAIN-com-cert-secret --namespace kubernetes-dashboard
Configure
-
Create an
IngressRoutefor accessing the dashboard, make sure to replaceMY_DOMAINwith your domain name1 2 3 4 5 6 7 8 9 10 11 12 13 14 15 16 17 18 19 20 21
cat <<EOF | kubectl apply -f - apiVersion: traefik.containo.us/v1alpha1 kind: IngressRoute metadata: name: kubernetes-dashboard namespace: kubernetes-dashboard spec: entryPoints: - websecure - web routes: - kind: Rule match: Host(\`kubernetes.MY_DOMAIN.com\`) services: - kind: Service port: 443 name: kubernetes-dashboard namespace: kubernetes-dashboard tls: secretName: MY_DOMAIN-com-cert-secret EOF
-
Check the resource was created successfully
1
kubectl describe ingressroute kubernetes-dashboard --namespace kubernetes-dashboard -
Set a hosted name
kubernetes.MY_DOMAIN.comon a client machine (laptop/desktop)1 2 3 4 5 6
# Edit the file using `sudo /etc/hosts` # Append manualy to the existing k3s master hosted name 111.222.333.444 kmaster, kubernetes.MY_DOMAIN.com # Alternatively, add a new hosted name entry with a one-liner echo -e "111.222.333.444\tkubernetes.MY_DOMAIN.com" | sudo tee -a /etc/hosts
Note: Replace111.222.333.444with thek3smaster node IP address andMY_DOMAINwith your domain name. -
Open browser at https://kubernetes.MY_DOMAIN.com
Note: If you encounter an untrusted certificate warning, please follow the cert-manager post Trust section for instructions on how to trust thetraefikcertificate.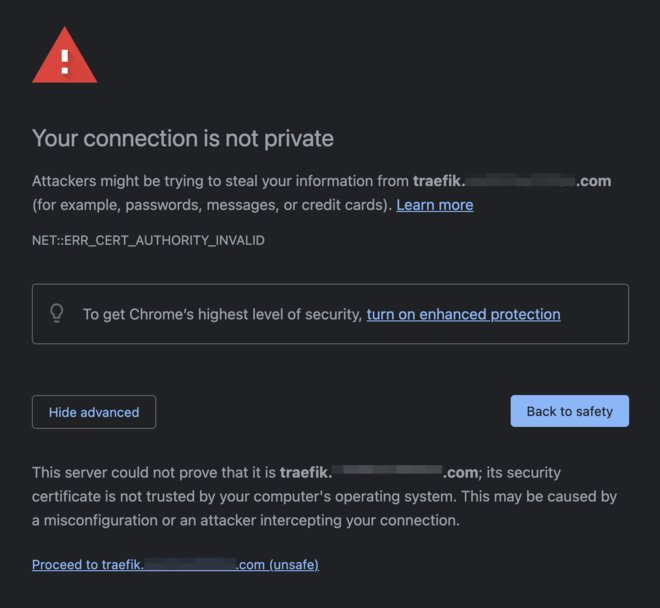
Remove Access
-
Delete Traefik ingress route
1
kubectl delete ingressroute kubernetes-dashboard --namespace kubernetes-dashboard -
Delete certificate and secret
1
2
3
4
5
# Delete certificate
kubectl delete certificate MY_DOMAIN-com-cert --namespace kubernetes-dashboard

# Delete secret
kubectl delete secret MY_DOMAIN-com-cert-secret --namespace kubernetes-dashboard
Authorization
These instructions describe how to connect to the dashboard using role based access control (RBAC) with service account tokens. For additional information about Kubernetes authentication options please read here.
Admin User
-
Create a service account for an admin user
1
2
3
4
5
6
7
cat <<EOF | kubectl apply -f -
apiVersion: v1
kind: ServiceAccount
metadata:
  name: k8s-dashboard-admin-user
  namespace: kubernetes-dashboard
EOF
-
Verify the secret was created successfully
1
kubectl -n kubernetes-dashboard get secret | grep k8s-dashboard-admin-user
-
Create an admin
ClusterRolewith extensive permissions on specific resources1 2 3 4 5 6 7 8 9 10 11
cat <<EOF | kubectl apply -f - apiVersion: rbac.authorization.k8s.io/v1 kind: ClusterRole metadata: name: k8s-dashboard-admin # "namespace" omitted since ClusterRoles are not namespaced rules: - apiGroups: ["", "extensions", "apps"] resources: ["deployments", "pods", "services", "secrets", "namespaces"] verbs: ["*"] EOF
Note: Update thisClusterRolewhen in need to extend for additional permissions. -
Bind the admin user to the admin role we have just created
1
2
3
4
5
6
7
8
9
10
11
12
13
14
15
cat <<EOF | kubectl apply -f -
apiVersion: rbac.authorization.k8s.io/v1
kind: ClusterRoleBinding
metadata:
  name: k8s-dashboard-admin
subjects:
  - kind: ServiceAccount
    name: k8s-dashboard-admin-user
    namespace: kubernetes-dashboard
    apiGroup: ""
roleRef:
  kind: ClusterRole
  name: k8s-dashboard-admin
  apiGroup: rbac.authorization.k8s.io
EOF
-
Retrieve the admin user secret token
1
2
3
kubectl -n kubernetes-dashboard describe secret \
   $(kubectl -n kubernetes-dashboard get secret \
   | grep k8s-dashboard-admin-user | awk '{print $1}')
Show Output

-
Open the login page, enter the secret under
Tokenfield and clickSign InShow Login

Cluster Admin User
-
Create a service account for the cluster admin user
1
2
3
4
5
6
7
cat <<EOF | kubectl apply -f -
apiVersion: v1
kind: ServiceAccount
metadata:
  name: k8s-dashboard-cluster-admin-user
  namespace: kubernetes-dashboard
EOF
-
Verify the secret was created successfully
1
kubectl -n kubernetes-dashboard get secret | grep k8s-dashboard-cluster-admin-user
-
Bind the user to the Kubernetes
cluster-adminrole1 2 3 4 5 6 7 8 9 10 11 12 13 14 15
cat <<EOF | kubectl apply -f - apiVersion: rbac.authorization.k8s.io/v1 kind: ClusterRoleBinding metadata: name: k8s-dashboard-cluster-admin subjects: - kind: ServiceAccount name: k8s-dashboard-cluster-admin-user namespace: kubernetes-dashboard apiGroup: "" roleRef: kind: ClusterRole name: cluster-admin apiGroup: rbac.authorization.k8s.io EOF
Note:cluster-adminis aClusterRolecreated at cluster initialization, it uses elevated permissions on all resources. -
Retrieve the cluster admin user secret token
1
2
3
kubectl -n kubernetes-dashboard describe secret \
   $(kubectl -n kubernetes-dashboard get secret \
   | grep k8s-dashboard-cluster-admin-user | awk '{print $1}')
Show Output
-
Open the login page, enter the secret under
Tokenfield and clickSign InShow Login
Read-Only User
-
Create a service account for a read-only user
1
2
3
4
5
6
7
cat <<EOF | kubectl apply -f -
apiVersion: v1
kind: ServiceAccount
metadata:
  name: k8s-dashboard-read-only-user
  namespace: kubernetes-dashboard
EOF
-
Verify the secret was created successfully
1
kubectl -n kubernetes-dashboard get secret | grep k8s-dashboard-read-only-user
-
Create a namespace scoped read-only
Rolewithget/list/watchpermissions1 2 3 4 5 6 7 8 9 10 11
cat <<EOF | kubectl apply -f - apiVersion: rbac.authorization.k8s.io/v1 kind: Role metadata: name: k8s-dashboard-read-only namespace: kubernetes-dashboard rules: - apiGroups: ["", "extensions", "apps"] resources: ["deployments", "pods", "services", "secrets", "namespaces"] verbs: ["get", "list", "watch"] EOF
Note: Update thisRolewhen in need to extend for additional permissions. -
Bind the read-only user to the read-only role we have just created
1
2
3
4
5
6
7
8
9
10
11
12
13
14
15
16
17
cat <<EOF | kubectl apply -f -
apiVersion: rbac.authorization.k8s.io/v1
kind: RoleBinding
metadata:
  name: k8s-dashboard-read-only
  # The namespace of the RoleBinding determines where the permissions are granted.
  # This only grants permissions within the "kubernetes-dashboard" namespace.
  namespace: kubernetes-dashboard
subjects:
  - kind: ServiceAccount
    name: k8s-dashboard-read-only-user
    apiGroup: ""
roleRef:
  kind: Role
  name: k8s-dashboard-read-only
  apiGroup: rbac.authorization.k8s.io
EOF
-
Retrieve the read-only user secret token
1
2
3
kubectl -n kubernetes-dashboard describe secret \
   $(kubectl -n kubernetes-dashboard get secret \
   | grep k8s-dashboard-read-only-user | awk '{print $1}')
Show Output
-
Open the login page, enter the secret under
Tokenfield and clickSign InShow Login
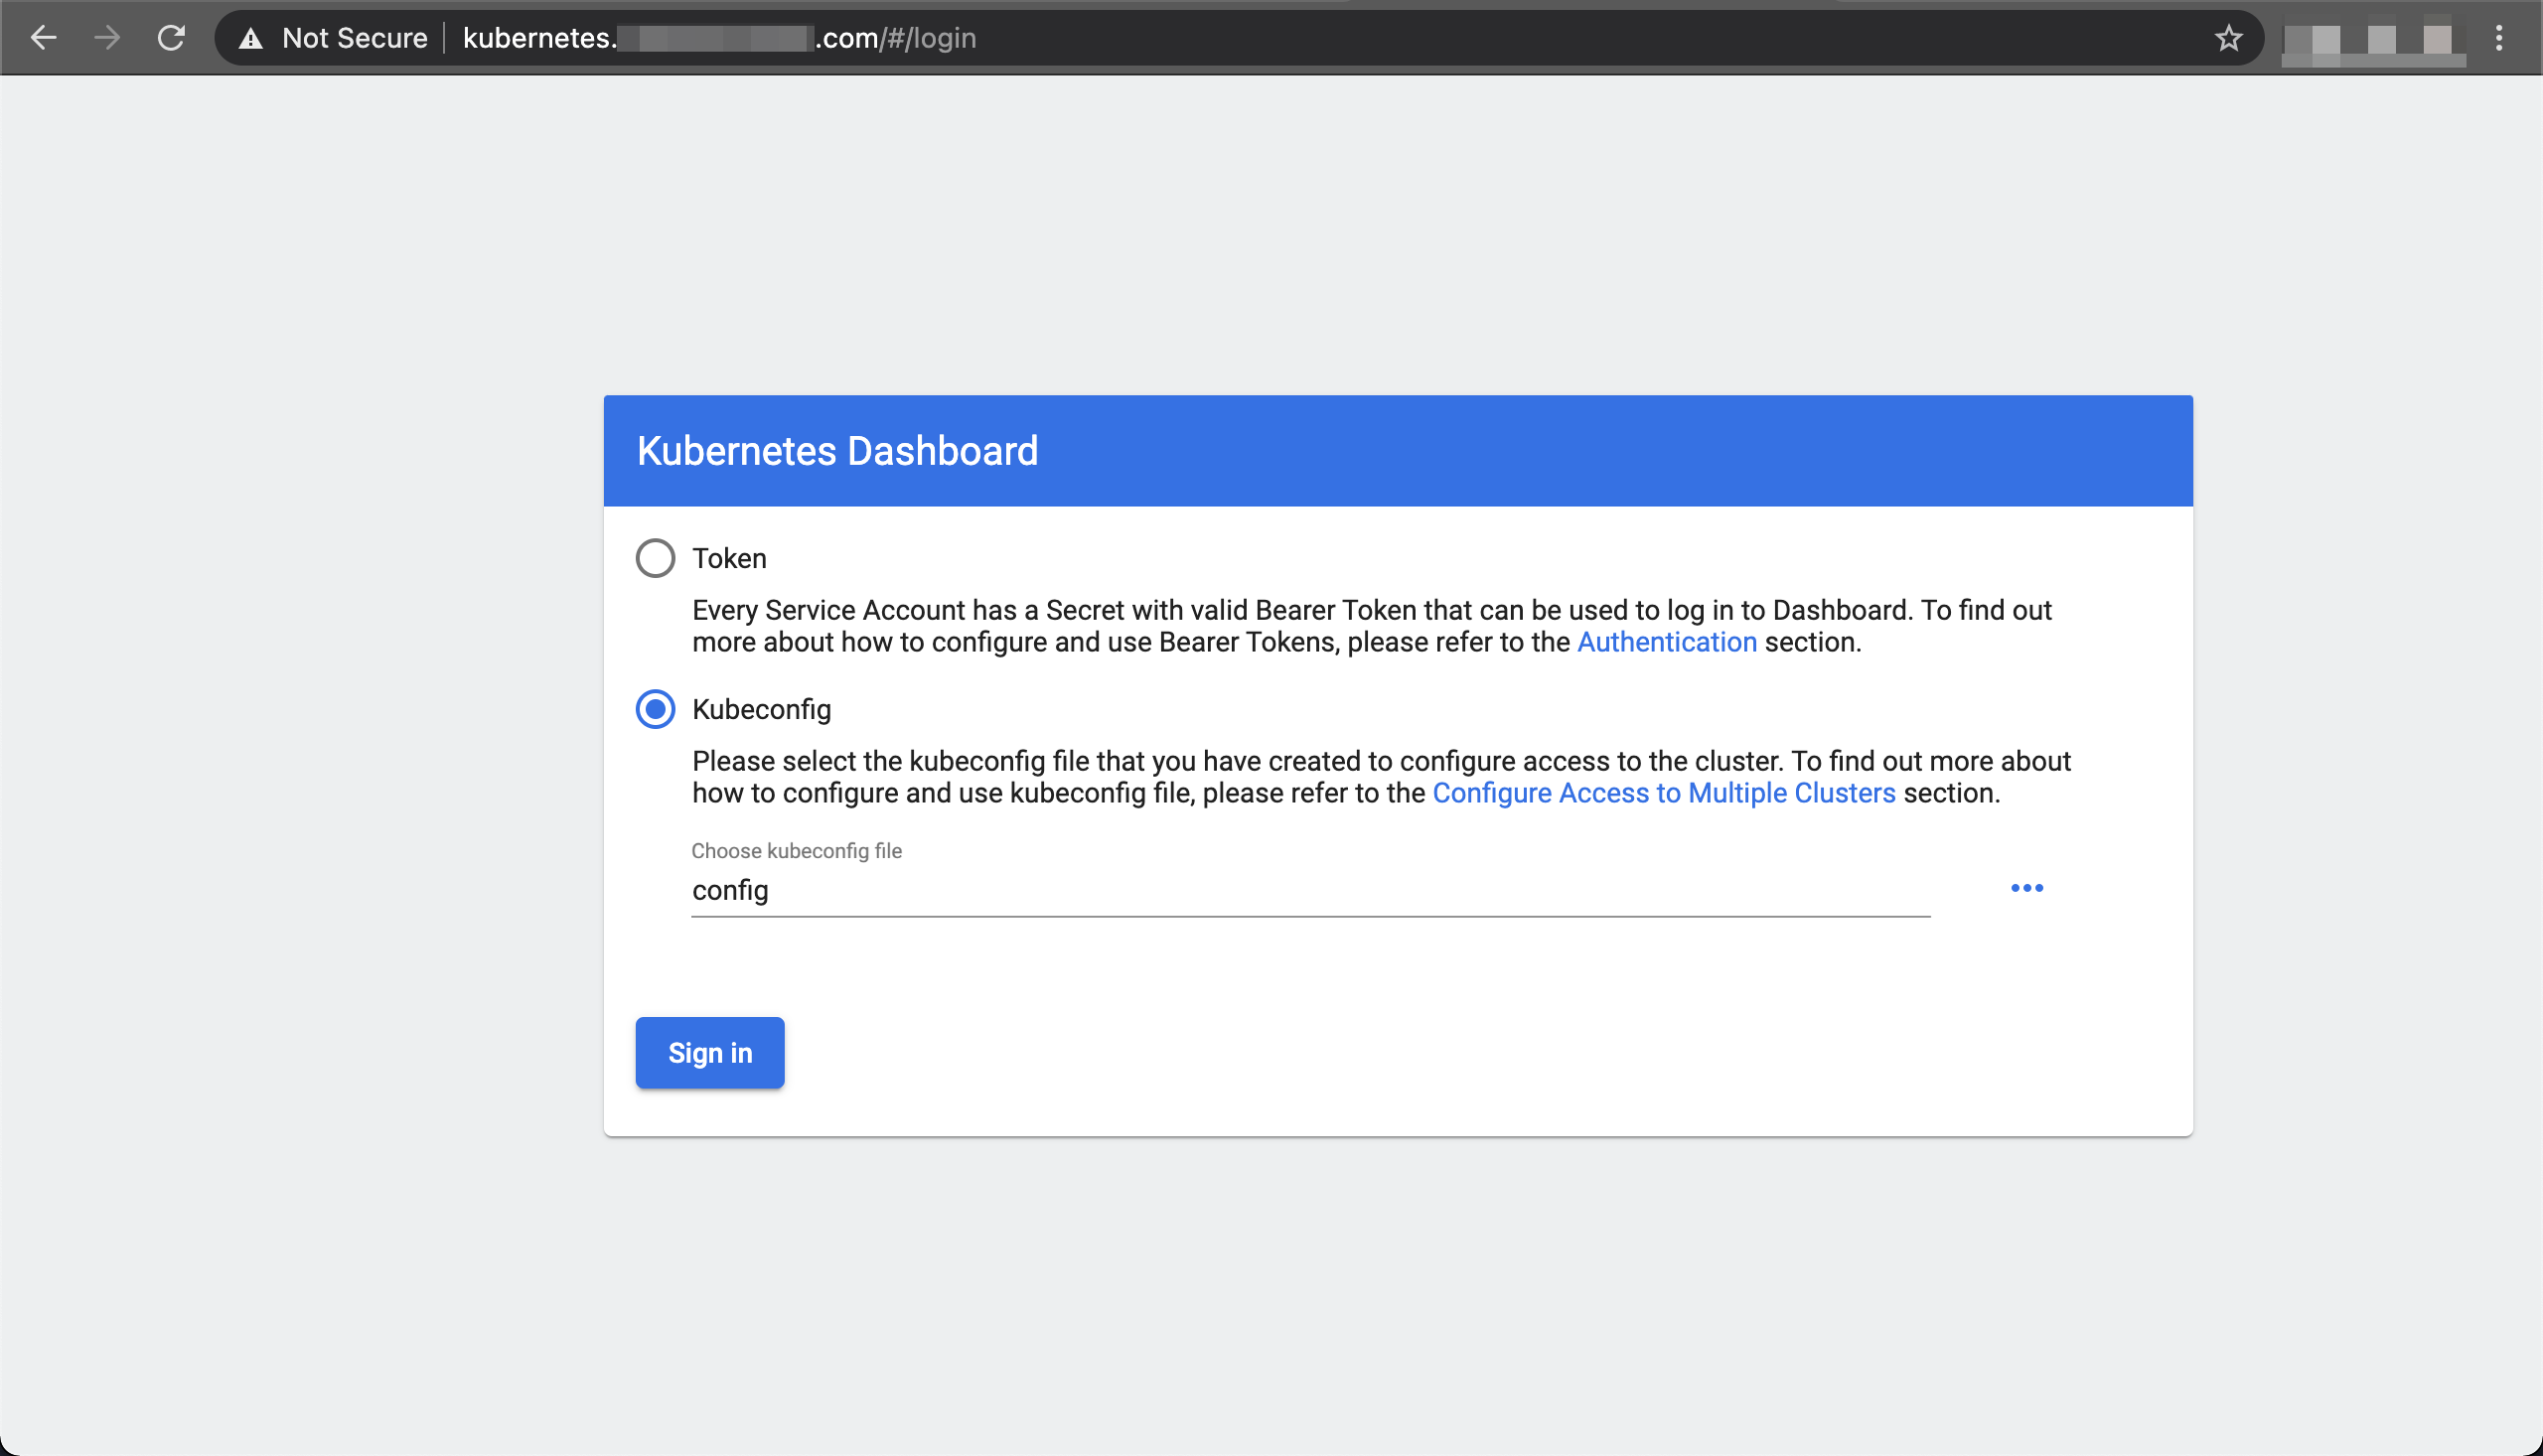
Access via kubeconfig
Kubernetes dashboard allows us to login using a kubeconfig file instead of copy-pasting a secret token on every login session. In order to do so, we will have to define one of our previously created users with their respective secret token as the kubectl current context.
-
Select a user from above steps and set its name and credentials on the
kubeconfigfile1
kubectl config set-credentials k8s-dashboard-read-only-user --token=<read-only-user-token-in-here>
-
Set the current
kubectlcontext to use the read-only user we have just added1
kubectl config set-context --current --user=k8s-dashboard-read-only-user
-
Verify the read-only user is properly set in context using
cat $HOME/.kube/k3s/config(or any other path containing the k8s config file, default is$HOME/.kube/config)1 2 3 4 5 6 7 8 9 10 11 12 13 14 15 16 17 18 19
apiVersion: v1 clusters: - cluster: certificate-authority-data: <cert-data> server: https://kmaster:6443 name: default contexts: - context: cluster: default user: k8s-dashboard-read-only-user name: default current-context: default kind: Config preferences: {} users: - name: k8s-dashboard-read-only-user user: token: <read-only user token in here> ...
-
Open the login page, select the
kubeconfigoption and choose the path$HOME/.kube/k3s/config(or any other path containing the k8s config file, default is$HOME/.kube/config)Show Login
-
Click
Sign In -
(Optional): To revert the current context to the previous
defaultuser1 2 3 4 5
# Unset the read-only user from config kubectl config unset users.k8s-dashboard-read-only-user # Set the context back to default kubectl config set-context --current --user=default
Summary
You now have a working Kubernetes dashboard accessible via web-browser at kubernetes.MY_DOMAIN.com with cluster-admin / admin / read-only users for authentication. Cluster visibility it at your hand ! :raised_hands:
What now? Keep on working on the Kubernetes cluster, deploying new resources and/or tweak existing ones while having the option to visualize the cluster state on every action that you take.
Please leave your comment, suggestion or any other input you think is relevant to this post in the discussion below.
Thanks !
Credits: Logo by kubernetes.io

Discussion